Friday, November 23, 2012

EVD 60mm Ludus Doctore - Completed

This wonderful little figure is completed now, although I may well dirty up his pants a bit more. I have some subtle yellowing tone shifts around the leg hems but I'm not sure this is enough. Next up from EVD is the "Charon" gladiator grouping. I am also pretty excited about the new grouping from EVD as well, three Romans and an Egyptian "hottie".


Sunday, October 21, 2012

EVD 60mm Ludus Doctore - Update #2

Although I still had some tweaking to do on the flesh, I started work on the rest of the figure as well. The leather jerkin that is worn would have most likely be tanned leather so my color choice here for a base coat was Burnt Sienna with some Orange added. This was stippled to indicate a tiny amount of texture and allowed to dry.
 
 
Afterwards a wash of Burnt Umber was applied to the fur, wrist protection and the jerkin. A wash of Van Dyke Brown with a tiny amount of Mars Black was applied to the shoes. Deep Cadmium Red mixed with Titanium White was applied to the trousers and highlights worked with Titanium White. A little Yellow Ochre was added to the red in the lowest quarter inch or so of the legs to show a dirty color shift. This will be worked later using some crisp over-painting and glazing.


A second wash of Burnt Umber has been applied in the photos below. Additionally I have done a bit more work on the flesh highlights with touches of white. A few shadows have been worked on the jerkin using Burnt Umber.


Another wash, Van Dyke Brown, as well as some deep shadow glazing on the leather jerkin. Further highlighting of the trousers was done using a lighter version of the initial color mix.


Mars Brown was applied to the belting and a mix of Burnt Umber and Mars Black to the fur. The whip was painted with the Umber/Black mixture as well. Mars Black was applied to the blade of the figure's Gladius and wiped off to darken the kit metal to a more realistic color and finish. Raw Umber and Yellow Ochre dots were mixed with Titanium White to get a very light ivory/bone color for the sword hilt. Light dry-brushing of the post using Titanium White with Van Dyke Brown added gives the aged look more realism in the wood, while Yellow Ochre and White were used to make the cuts look more recently exposed to the elements. From this point on it will all be about crisp detailing on the fur, belts leather, edging etc.


Saturday, October 20, 2012

EVD 60mm Ludus Doctore - Update #1

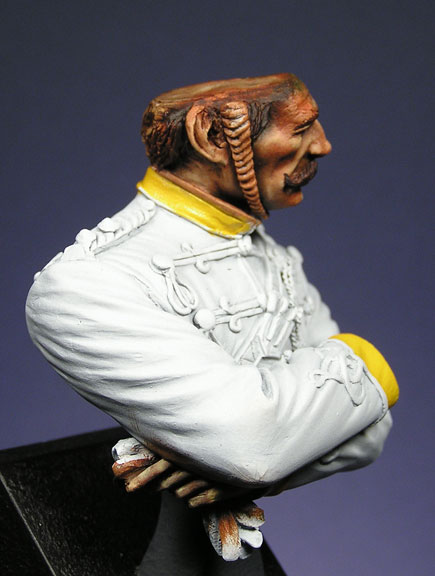
As with all of my figures, everything begins with the flesh and this figure is no exception. It has been 15 years since the last time I had to paint African flesh tones so a bit of a refresher was required before starting. In those fifteen years my painting style and technique have changed as well so this has been quite a new and challenging project to this point.
 
I began with a basic mix of Burnt Sienna, Burnt Umber, a bit of Yellow Ochre and Prussian Blue added to darken the mix and cool the tones a bit. This was applied overall and the excess removed with a soft brush. Prussian Blue and Burnt Umber were mixed and applied to shadow areas and blended. Titanium White with a bit of Yellow Ochre added was used to start lifting the highlights. This produced the initial work that you see in the next two photos.


Once dry, further shadows were worked with a mixture of Burnt Umber and Prussian Blue used as a thin glaze. Layering thin glazes tend to begin to dull the finish as they dry. This contributes greatly to a more realistic finish for flesh with the use of oils. Not to flat and not to shiny, just right. Again after drying, further highlights were picked up using Titanium White glazes.


A touch of Alizarin Crimson and Burnt Umber in the lips and a few hot spots of white on the lips, nose, chin and neck muscles set the final tones.
 
 
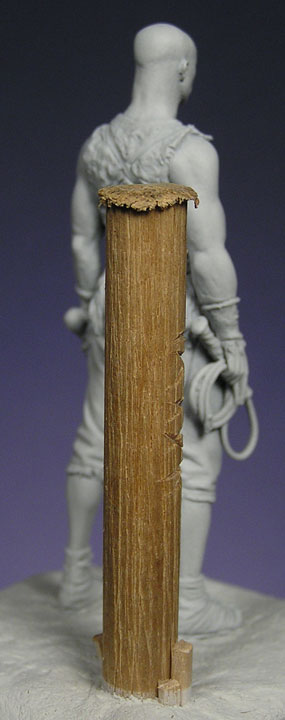
Additional work was done on the post with light washes of Burnt Sienna, Burnt Umber, Van Dyke Brown, Mars Black (in that order) to draw out the graining of the wood and aging the post. Additionally some initial tonal work was done on the figure's shoes and the sand.

Tuesday, September 18, 2012

Ludus Doctore 60mm EVD

Every now and then a figure comes along that causes me to "re-order" the priorities on my workbench. Such is the case with the new releases in the ROMA series from EVD. Billed as 54mm these minis are really more along the line of 60mm plus. Depicting various figures from the Roman Gladiatorial Arena, these minis are quite naturally right up my alley.
 
After having released a series of figures in resin that will be the subject of future projects for me, a new release in white metal has hit the market and it was one that I wanted to do right away. Depicting a "Doctore" or trainer of the gladiatorial "Ludus" or school, our figure is an African subject holding the expected whip and gladius. He is wearing trousers with a bit of fur around the lower torso, as well as a form fitting leather upper torso garment. The figure is in a simple yet powerful and dominant pose. For this piece I wanted a symbolic but simple groundwork depiction, so I chose to depict the school's "palus" or training post.


Depicted below is a model of a "Ludus Magnus" from Rome as depicted in the Museo Nazionale Della Civilta Romana, one of the larger Roman Gladiatorial Schools.
 
 
The pole was fairly simple to create. I began with a simple pine dowel which was weathered by first drawing a razor saw's teeth across the dowel lengthwise. Then a hammer was used to mash one end to appear as if the pole had been driven into the ground. The dowel was glued in a hole that had been drilled in the base and wooden toothpicks were shaved to make stakes that would be used to help straighten the post in the school's training arena.
 
Epoxy putty was used to create the soft sandy groundwork and a stiff bristle oil painting brush was used to gently texture the surface prior to curing. The figure was pinned as usual using brass rod, for a strong attachment to the base. The whole base and post were masked and the figure primed as usual with white automotive primer.
 

Monday, September 17, 2012

Heavy Roman Infantry Weathering


I promised some shots of my last vignette once the weathering had been completed. Despite the fact that many of you may be tired of seeing this piece already I wanted show it in it's final glory. In addition to adding dirt and stains, a few scrub plants were added as well. I also replaced the name plate as I had inadvertently forgot to over strike the date with a correct one when I first printed it. I think the final result is much improved over the last photos. I hope you all agree.


Madras Light Cavalry Bust - Update 2


After the lower portions of the jacket was blended, more titanium white was added to the mix and painted on the upper areas of the jacket.. Highlight areas were further worked wet-on-wet with more titanium white. These mid tone highlight and shadow areas will be further worked using glazing techniques once dry.


Prior to that however, all of the lace and belting was given gradated shading undertones using Payne's Gray, Lamp Black and Titanium White mixed together. After this dried, deep shadow work began. That will be the subject of my next post.

Madras Light Cavalry Bust - Update 1

Due to a number of personal issues I have been very neglectful of my blog postings lately (work and family). This means that there will be quite a few updates over the next 48 hours. I promised Steve at SK Miniatures that I would do a step by step on this very nice and colorful bust. I have been busy on it so there will be a lot to show and tell.


As always I started with the face. Due to the tropical climate, angle of the face and the helmet, to be added later, I wanted to go for very strong highlights and shadows on the face and hands. Once the helmet is attached I will go back in and further refine these details. I used Chrome Green Deep from W&N added to the flesh mix to create shadow tones while still working wet-on-wet. This is something different for me as I usually wait to do my shadows until the initial colors have dried.


My references for the coat show an interesting color of Sky-blue, something with a greyed out tone to it. I started by mixing Indigo, Cerulean Blue, a touch of Lamp Black and Titanium White for my base color. Lower portions were painted with Indigo and Black and the two areas were blended prior to painting the upper portions of the jacket. Deep Cadmium Yellow and Mars Yellow were mixed to create the facing color for the collar and cuffs.

Sunday, August 5, 2012

Heavy Roman Infantry Vignette - Completed


At long last this piece is nearly complete. Except for some weathering on the shields and any minor touch ups required it is done. I really need the arrows to dry before getting anywhere near the shields with a brush. Just realized that I didn't over type the date so a new name tag is in order as well.

This vignette of The Battle of Resaena was quite a bit of fun despite the time required to complete. Enjoy!